Assign a Button to a Macro
Learn how to assign a macro to a button and place that button in the Heads-up section.
We all love the macros. They are fantastic automation tools. To run a macro we should browse to the file and press the Run command. But what if we could make a button that would run the macro? In this blog post we will discover how to do just that. I will show how to define a macro button in the View (Heads-up) section.
Step 1: Make Sure You Can See the View (Heads-Up) in Your Screen
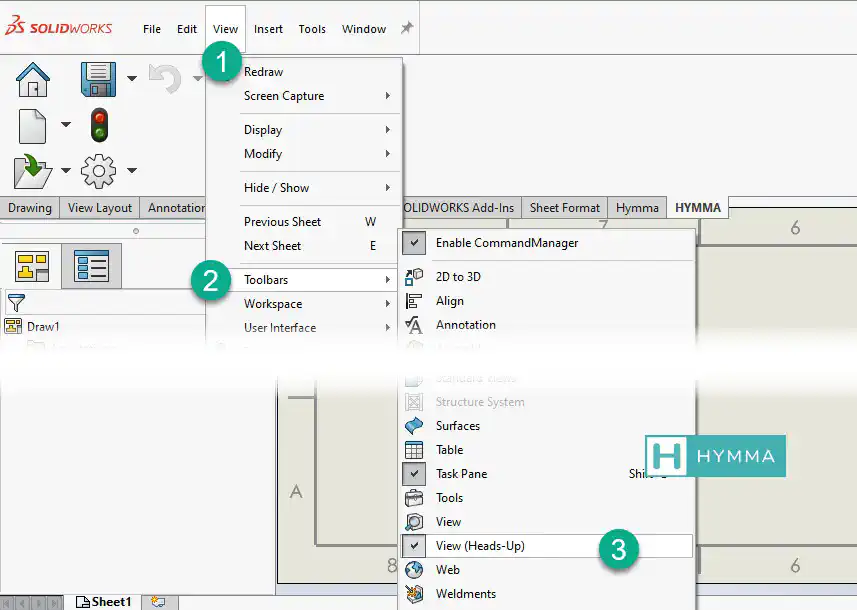
By default the Heads-up section is active. This section holds the most popular commands in SolidWorks. Some of the defaults that are listed here are: Zoom to Fit, Previous View and more. But if you can’t see it follow these steps.
- Next to SolidWorks logo open the
Viewmenu. - Towards the end of the list find the
view (Heads-up)and make sure it is checked.
Step 2: Open the Customize Window
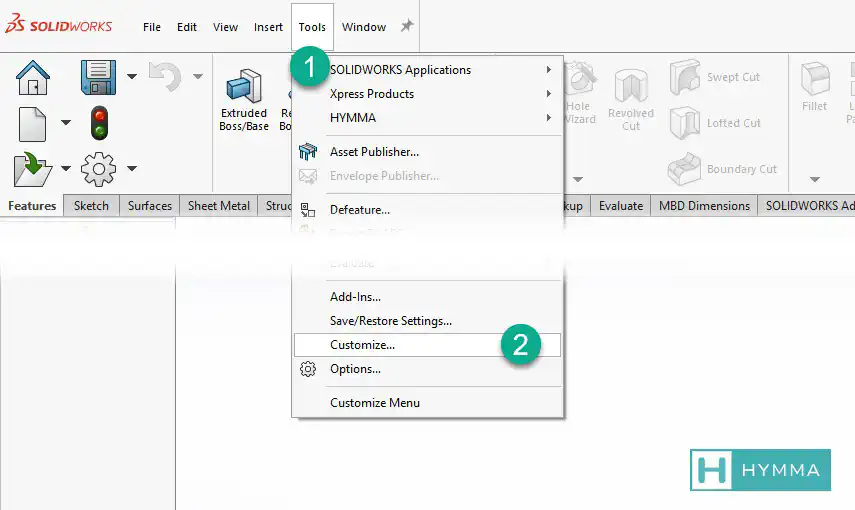
Since we are going to edit the Macro command in SolidWorks. We should access it through the Customize ... window.
- Next to SolidWorks logo open the
Toolsmenu. - Find the
Customize ...item from the bottom of the menu list. This opens up the Customize window.
Step 3: Locate the New Macro Button in the List of Macro Commands
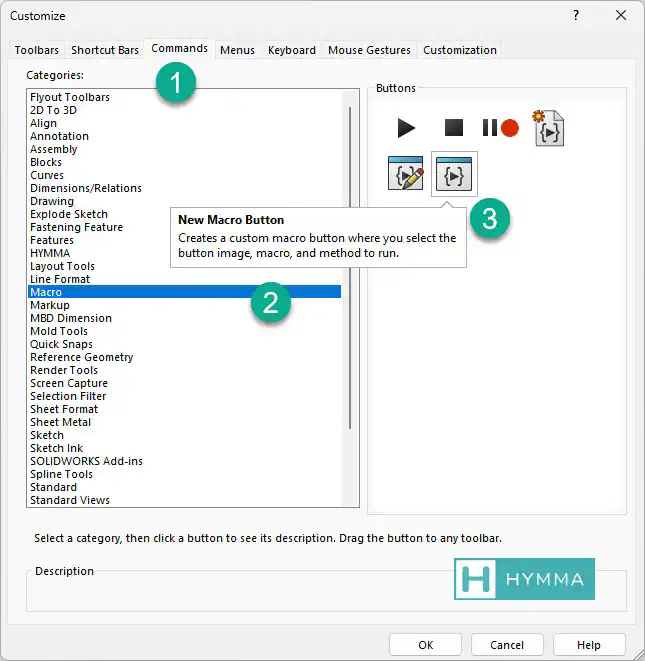
Now we have the Customize window open. We can see the list of commands that each category provides.
- Activate the
Commandstab - Find the
Macroon the list of categories. - On the right hand side find the
New Macro Button
Step 4: Drag the New Macro Button to the View (Heads-Up) Section
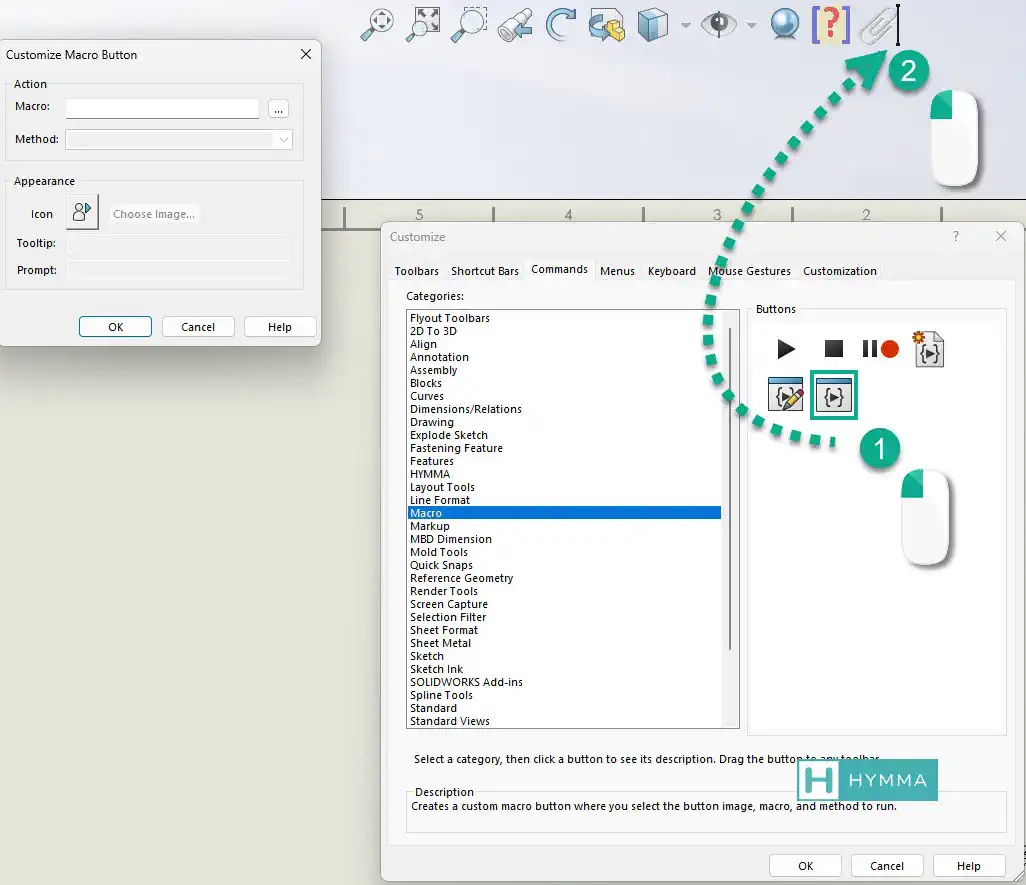
The New Macro Button is a template for the button. We need to drag it to the Heads-up section. Once you let go of the mouse button a new window will pop-up. We define the macro properties in this window.
Step 5: Customize Macro Button
In the previous steps we accessed the Customize Macro Button window. It is time to assign the macro to the button.
Click on the
...button next to theMacro:. This will open another window to browse to the actual macro file. Notice that you can only select.swpor.dllfiles.From the
Method:drop down list select the method that is defined in the macro. Each.swpfile can have multiple methods. This drop down let us select one of those methods. If the macro has only one method defined you will have one option to choose.Under the
Appearancegroup select theChoose Image ...button. A new window pops up to browse to a.bmpfile. The image you provide will change the default button.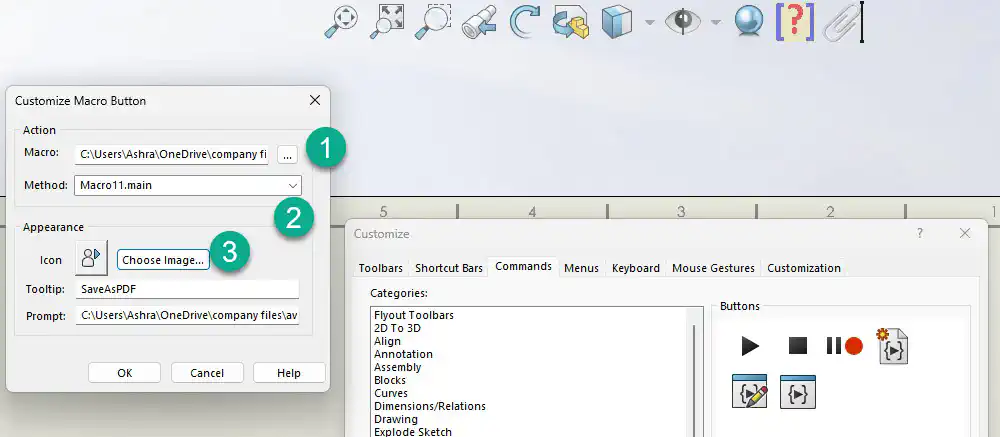
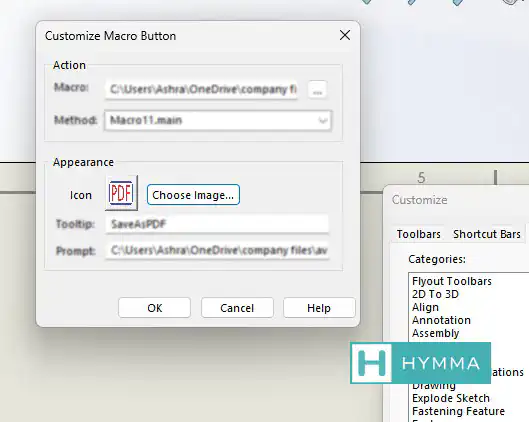
Type in the tooltip for your button. When you hover over the button a pop up shows the tooltip and a prompt. It is useful to show some information about a command to the user.
Once you are happy with the setup click
ok. And do the same on the Customize window.
.bmp format. To convert an image to .bmp open it in Paint and save the file as .bmp.Final Result
Below you can see a screen shot of the final result. In this blog post I showed you how to assign a button to a macro in SolidWorks. This should help you to access your favorite macros much faster.
